To tell you the truth, I was hesitant about making a dragon. Life got really busy as soon as we came back from our Christmas holidays, and Chinese New Year was fast approaching. I didn’t think we’d have the time, and it seemed challenging to make a cute dragon since I was so used to making my cute bears and bunnies. Ryan, who is always up for a challenge, strongly encouraged me to give it a try, saying that we’d have enough time and that it would be really special since it was Chinese New Year. It had been exactly a year ago since we had created our first original design and pattern: the
Chinese New Year Doll. With his support and encouragement, we began brainstorming ideas of what our dragon would look like. The only dragons that came to mind were “Mushu” from
Mulan, “Toothless” from “
How to Train Your Dragon”, “Puff the Magic Dragon”, and the Dragon from
Shrek. We looked for images of inspiration on-line by googling “cute dragon” and this adorable picture immediately jumped out:
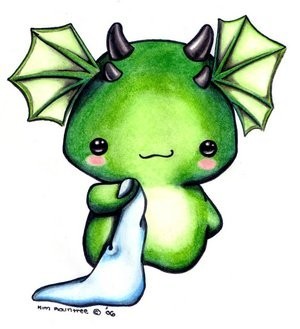
We thought this little green dragon was so sweet! We initially had difficulty trying to find the artist who drew this picture as no one who used this image was able to locate the source. However, an astute tumblr reader informed me that the artist is actually
Kim Rountree of
Oborocharms (check out more of her kawaii art
here). We based our amigurumi dragon on this image since he was so unbelievably adorable!
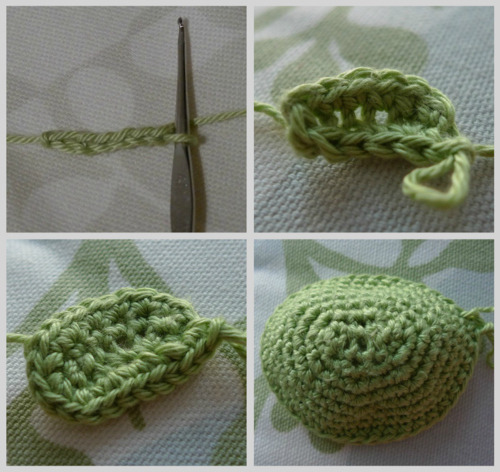
This Dragon’s head is different than all the other amigurumi I’ve made since it is not spherical or ball-shaped. Rather than starting off with the magic circle, I crocheted around a series of chain stitches to create an oval shape.
As you can see, I then started widening the head and then sharply decreasing. Ryan added the eyes and then stitched this cute mouth with a little fang!
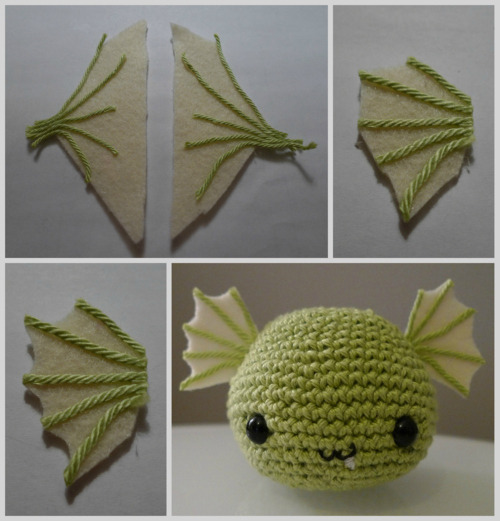
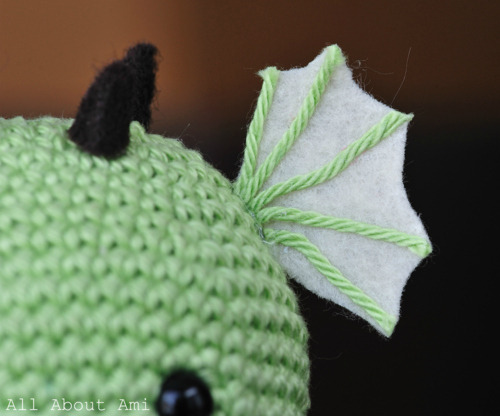
Ryan then excitedly began working on the wings. He cut out two pieces of beige felt shaped like isosceles triangles. Next, he cut pieces of the same green yarn that I used to crochet his head and splayed them outwards from the tip of the triangle. Using fabric glue, he secured the yarn in place. He then trimmed the felt cutting from one piece of yarn to the next and then scalloped the edges between the yarn pieces. Ryan secured the wings onto the Dragon’s head using a glue gun. He did all this as I was checking my e-mail since he wanted to keep it a surprise…I squealed with delight when I saw how awesome his wings looked!
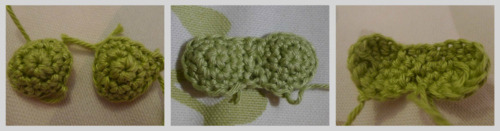
Next I worked on Dragon’s legs/body. I crocheted two circles and then joined them together. I then continued crocheting around these two joined circles, similar to how I made the
baby P.J. Teddy’s legs.
I continued for a few rows until the cute little body was complete!
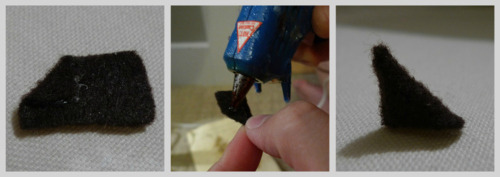
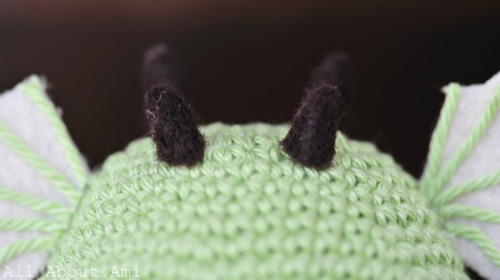
Ryan then worked on the four horns for our little Dragon. He cut out these pieces from dark brown felt, applied glue with a glue gun, and then rolled them into cone shapes.
I was so happy with how Dragon was turning out since he had so many cute details! After adding the horns, the pink cheeks and the body, I crocheted two small arms and attached them to the sides. On a completely unrelated note, Dragon matches perfectly with the pattern of my armchair!
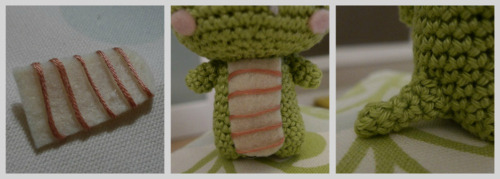
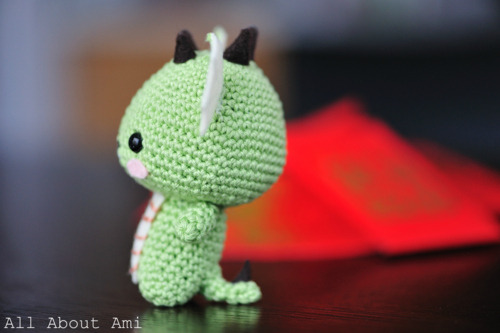
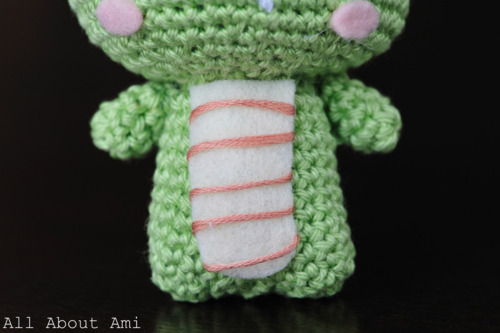
Ryan then used felt and embroidery floss to add this scaled detailing to his body. Ryan is so adept at using felt :) I then crocheted a little tail and attached it angling a little higher up than normal so that it appears that Dragon is leaning back (visible in upcoming pictures). This tail also gives him balance so he can stand all by himself!
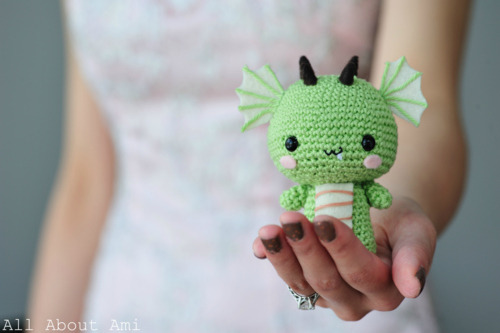
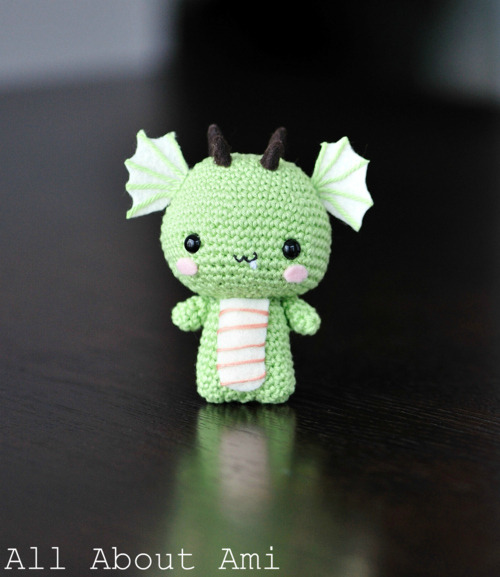
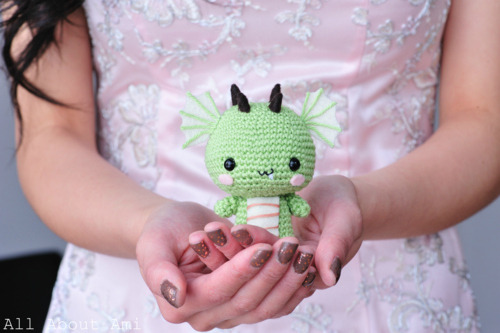
And now, may we present to you our finished little Dragon!
In the Chinese culture, dragons are symbols of power, strength and good luck. Because of this, the Year of the Dragon is very popular!
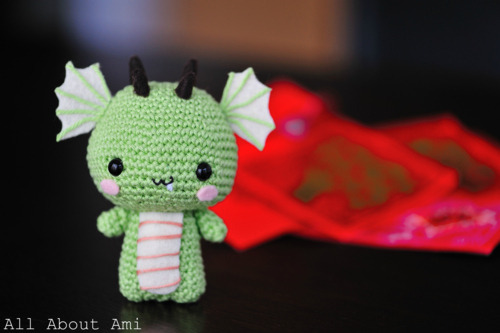
With his tail positioning, our little Dragon is leaning back…doesn’t it look like he’s about to let out a puff of fire? As you can see here, we also added a little spike to the tip of his tail!
We are so thrilled with how he turned out, particularly with all the details that Ryan added…
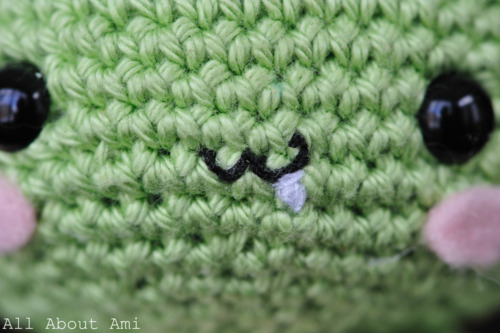
Here is a close-up of Dragon’s face: I love the shape of his head and his cute expression :)
And here is a really close-up view of his mouth. Haha, the little fang could also look like some drool coming down from this little guy’s mouth…
The four felted conical horns: the two in the front are smaller than the two in the back.
Another close-up view of his wing:
And another close-up view of his scaled body:
Isn’t he precious? I am sooo happy that Ryan encouraged me to make him. He brings a smile to my face whenever I see him…
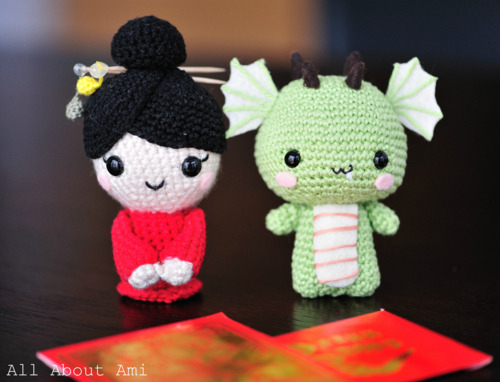
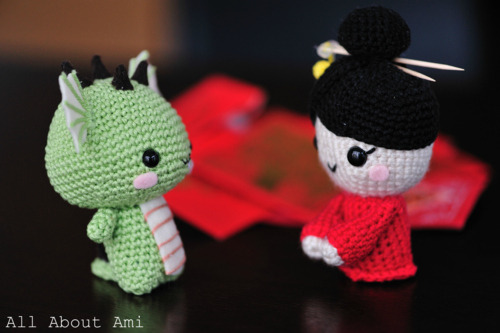
I can’t believe it’s been a year since we made our first original design. We’ve come so far and made so many amigurumi since then, but
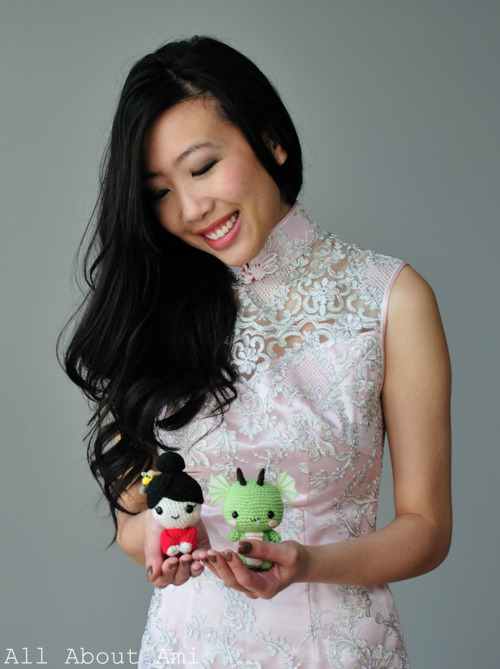
Chinese New Year Doll is still very unique and will always hold a special place in my heart. They make a cute pair, don’t they?
So now you have two ways to celebrate Chinese New Year! The Dragon would be a great gift for any babies who are born this year or for anybody who is the Year of the Dragon :)
I was trying to think of different ways to photograph our new Dragon, and I thought it’d be special to whip out my Chinese dress (cheongsam or qipao) that I bought in Hong Kong. I actually wore this dress during the tea ceremony of our wedding where we received a lot of red pocket money and jewelry. I love the detailing and pinkness of my dress since it is different than the traditional red ones!
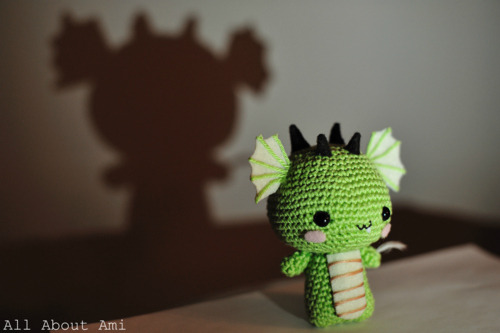
As Ryan and I were working on Dragon at night, we noticed the scary shadow that he was casting… Wouldn’t it be funny if you saw this ominous shadow at night but then turned the corner to find this little cutie?
“
Gung Hei Fat Choy” or
Happy Chinese New Year, everyone! I hope you like the Dragon we made, and thank you for the wonderful response to him so far :) Ryan and I really enjoy reading all your comments on the blog, facebook and on tumblr, and it’s so rewarding being able to share our love of crafting with you all! I always enjoy working through the whole amigurumi process with Ryan, and I feel very blessed and fortunate that I have such a supportive, creative, crafty and encouraging hubby!
The pattern for this little dragon can be found HERE while the pattern for the
Chinese New Year Doll can be found
here. Don’t forget to send me photos of your finished products through e-mail,
facebook or
twitter! Let me know what you think of him! Our dragon is also in desperate need of a name…any ideas?
[
Note: People have been sending me photos of their baby Dragons, and I’ve compiled them into a
Crochet Corner post
here!]


 Wrap a loop around your index finger. Twist it one half-turn and pull it down around your middle finger. Twist it again, pull it around your ring finger, then twist it once more and wrap it around your pinkie.
 Repeat step 1 with another loop. Then pull the bottom index-finger loop (ours is yellow) up past the new loop and off your finger, lifting from the back of your hand toward your palm. Do the same with the loops on your other three fingers.
 Repeat steps 1 and 2 until the rope is as long as you want. At this stage, the ends should be about 4 inches above your armpits with the midpoint touching the ground.
 To remove the rope from your fingers, first snip a new loop into a strip. Thread the strip through the loops on your fingers, pull out your fingers, and knot together the ends.
 To make the handles, fold over 4 inches of rope at each end and wrap it with loops.